Page Content
Portal-Based Basic Demo
To try using the Phenix platform, contact Phenix for an Application ID and secret.
Once you have an Application ID and secret, follow the instructions on this page to use the Phenix Portal to:
-
Create a test channel
-
Create a publishing permalink
-
Publish your webcam
-
Create a viewing permalink
-
View published stream
For more information on the Portal, please see the Portal documentation.
Create a test channel
Access the Phenix Portal.
Log into the Portal and create a new channel by clicking on the plus sign in the upper right corner of the Channels page.

The portal will display a dialog. Enter an alias, name, and description for the channel.
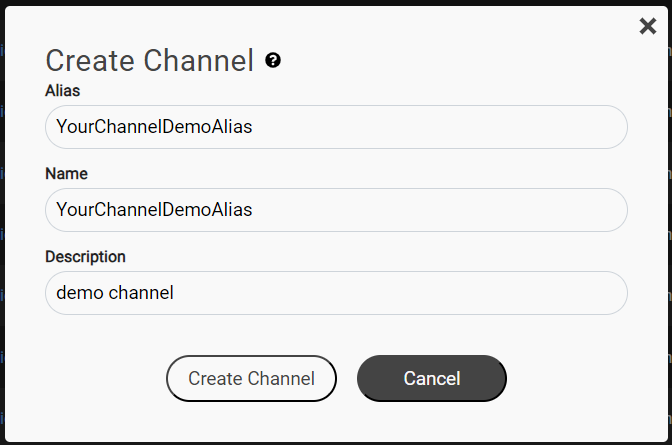
The new channel will be shown in the Channels page.

Create a publishing permalink
Click on the channel name, then click the "EdgeAuth" option to the right, which will show the EdgeAuth token creation page.
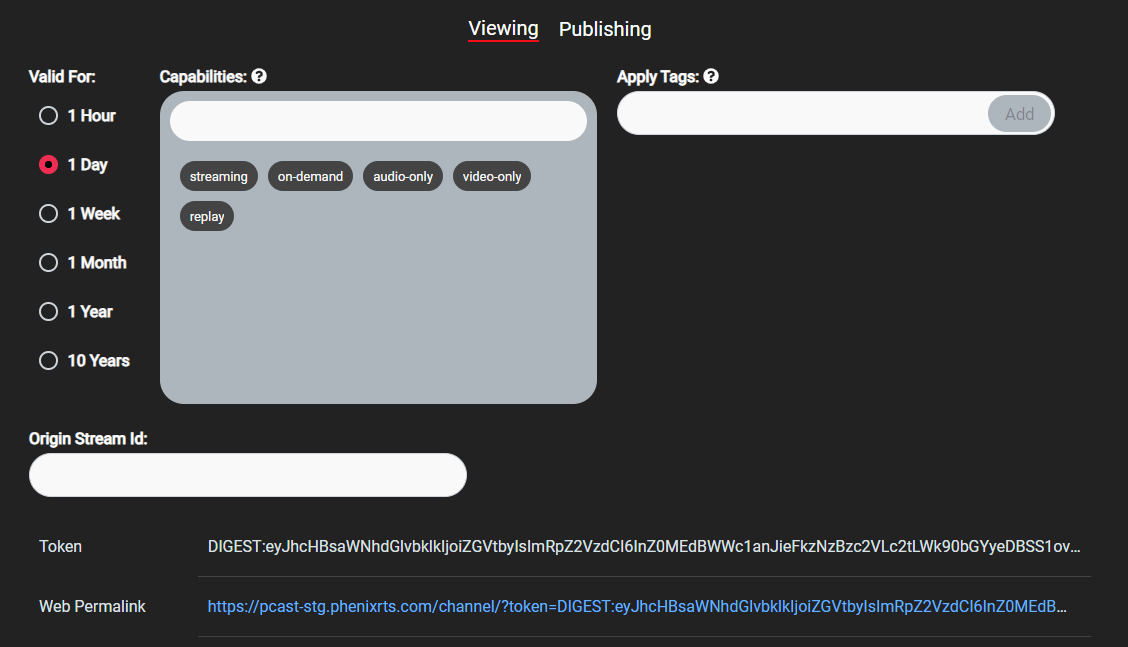
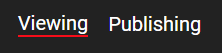
The subtab name allows you to choose either Viewing or Publishing.
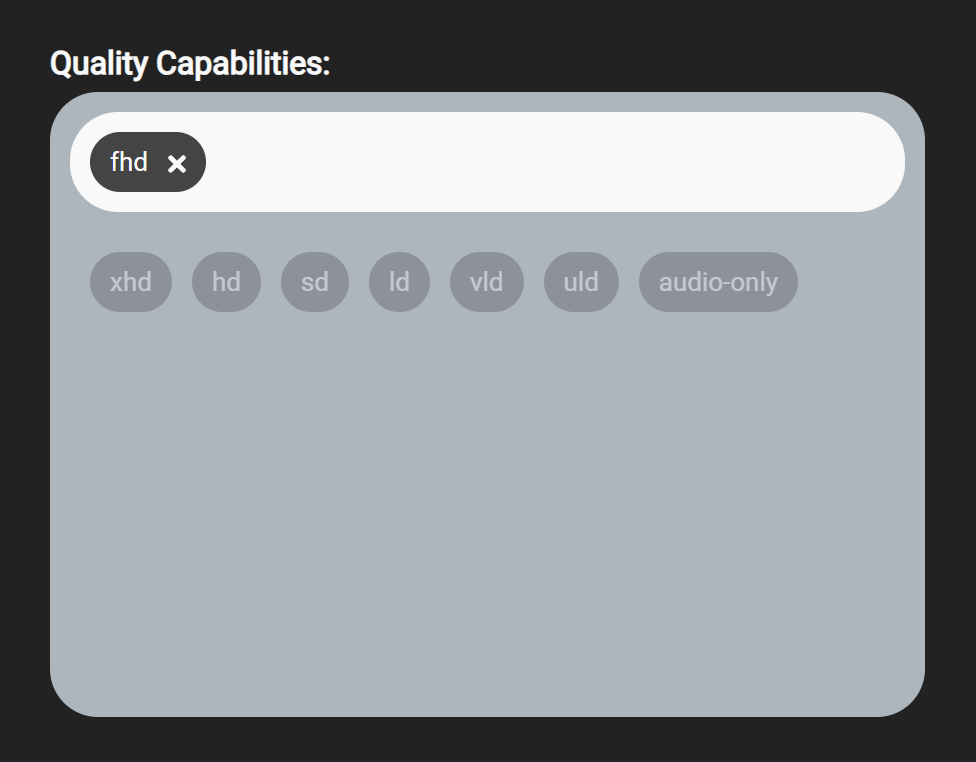
Select "Publishing". An additional option will appear to select Quality Capabilities. Select hd.
Select the capabilities for the link using the gray Capabilities box. For initial testing, we recommend
you select only multi-bitrate.
The capabilities are described on the Capabilities page.
As you select your options, the Portal will generate tokens as well as a permalink.
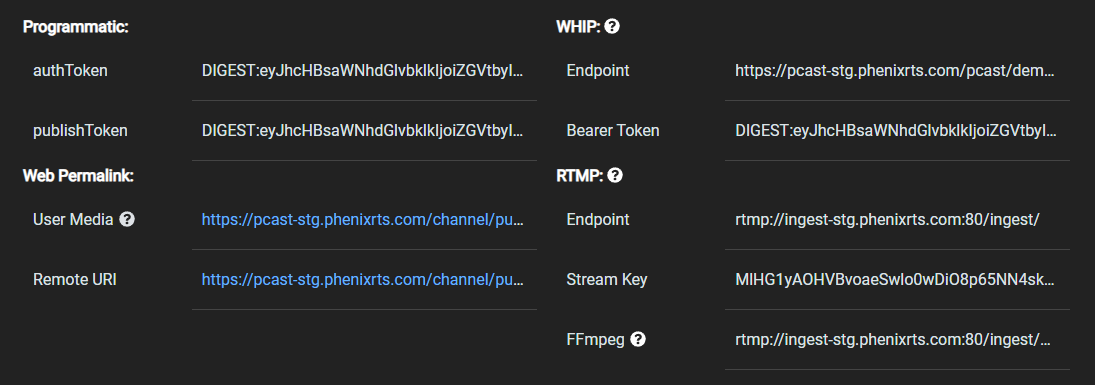
Click the "Copy" icon shown when you mouse over the User Media permalink to copy the permalink to your clipboard.
Publish your webcam
To publish to a demo channel via a browser, paste the permalink into a browser that supports WebRTC. You can also simply click on the permalink to open a new browser window.
All modern browsers support WebRTC. A list of supported browsers can be found here.
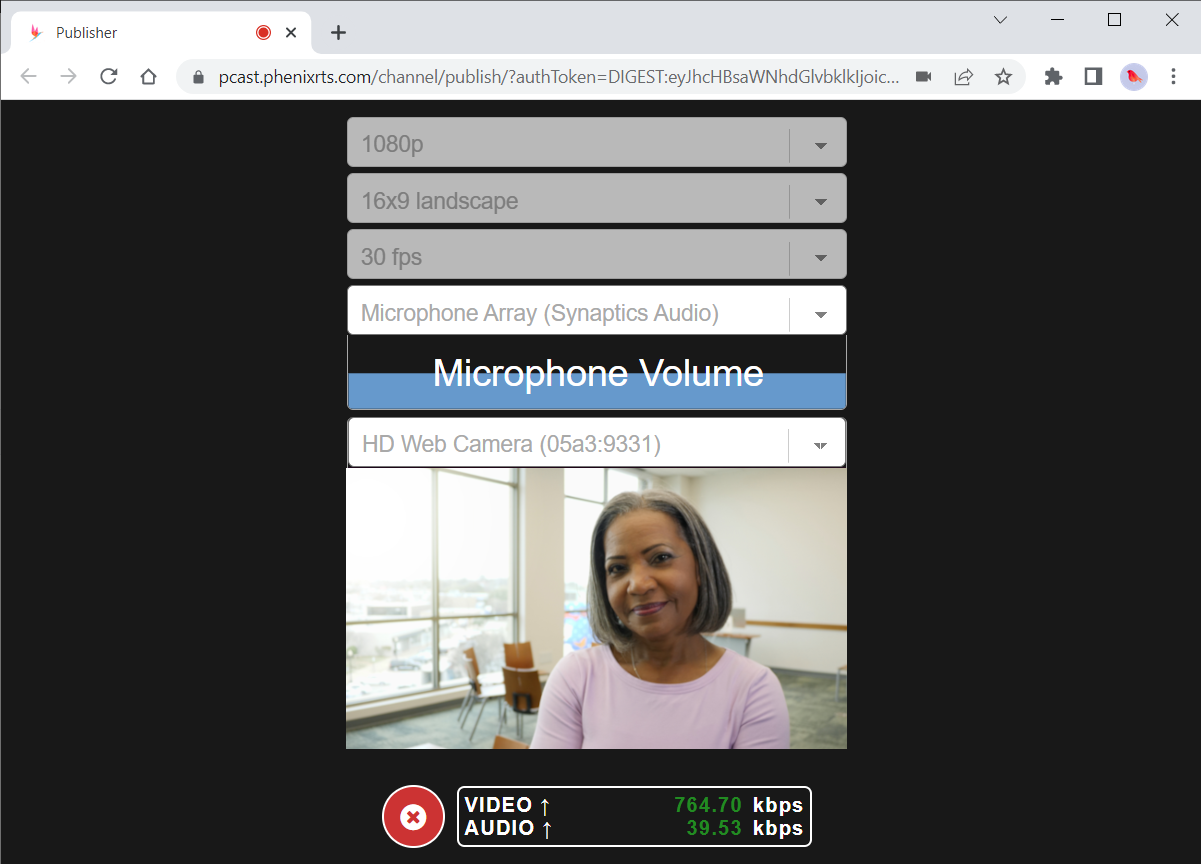
Publish your webcam by selecting the desired options and clicking the red cloud up-arrow icon.
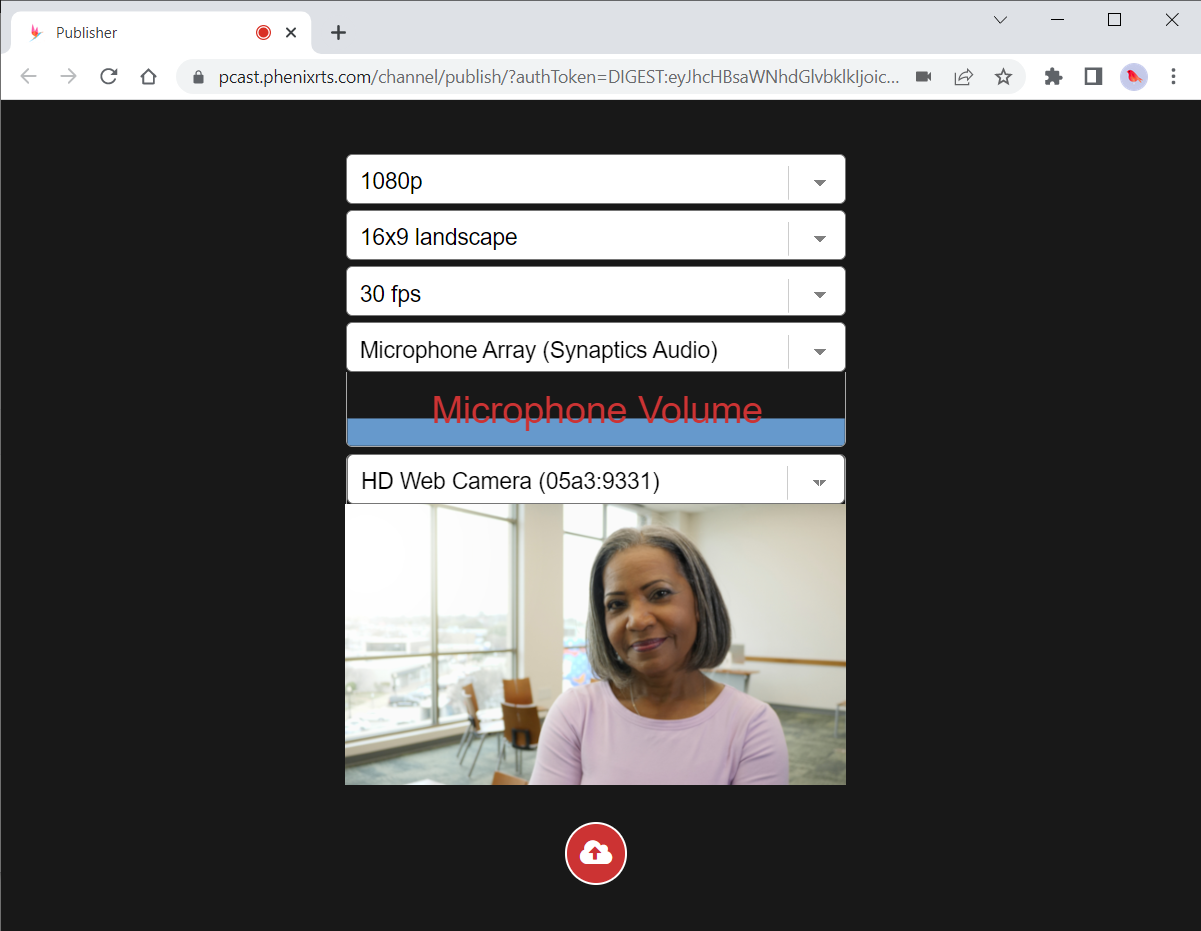
Make sure your browser has permission to use your webcam.
The screen will indicate the video and audio bitrates.
Create a viewing permalink
Returning to the Portal, create a viewing permalink by selecting "Viewing" from the "Link Type" field. Use the default options.
View published stream
View the output of your test channel by clicking on the permalink or copying it and pasting it into a browser that supports WebRTC.
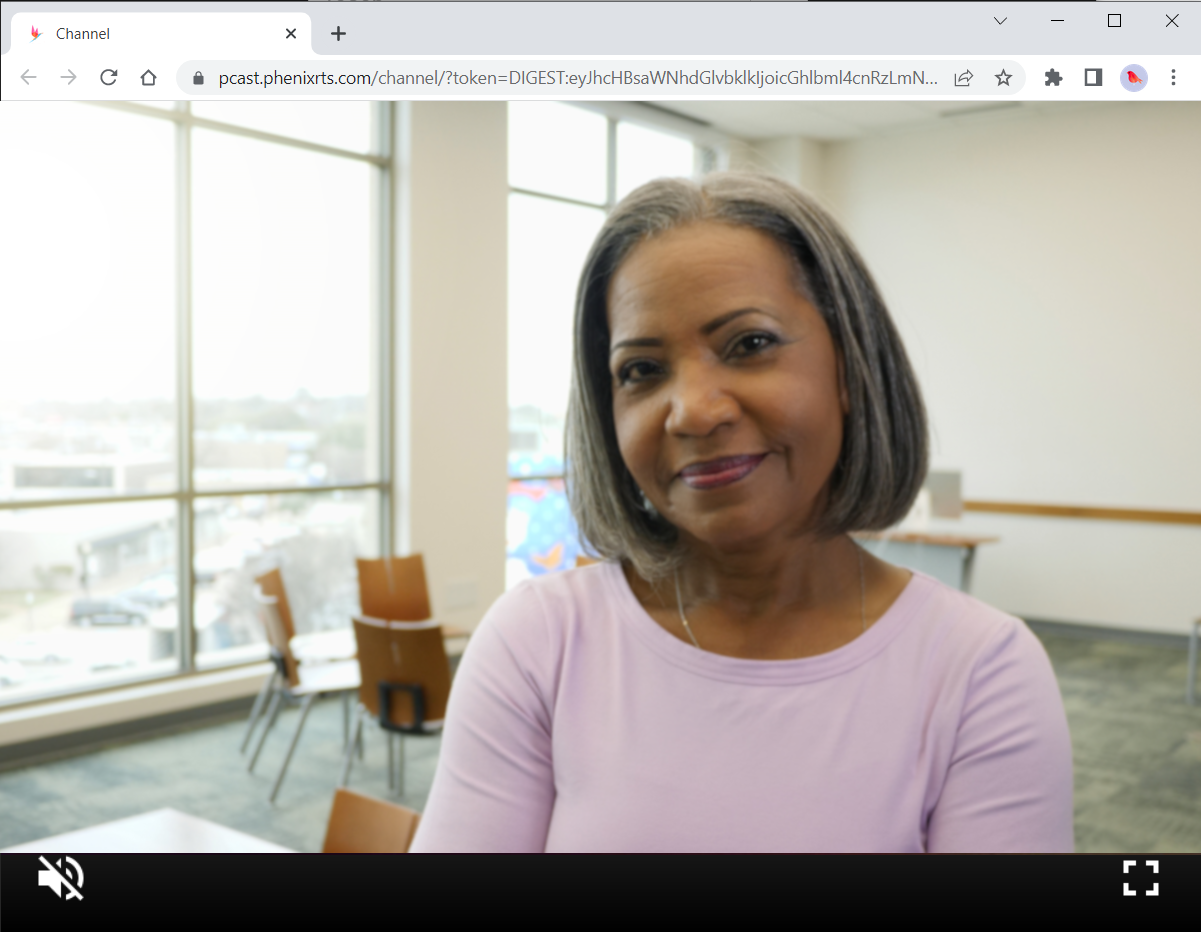
Put the two browser windows side by side to see the amount of delay from publishing to viewing.

To stop publishing, either click the red X or close the browser tab that is publishing.
v2025-03-24T21:12:24.000Z